01 — Selection
Choose your colour, height & material
Three choices shape the look and strength of a chain link fence: colour, height and the gauge of the mesh.
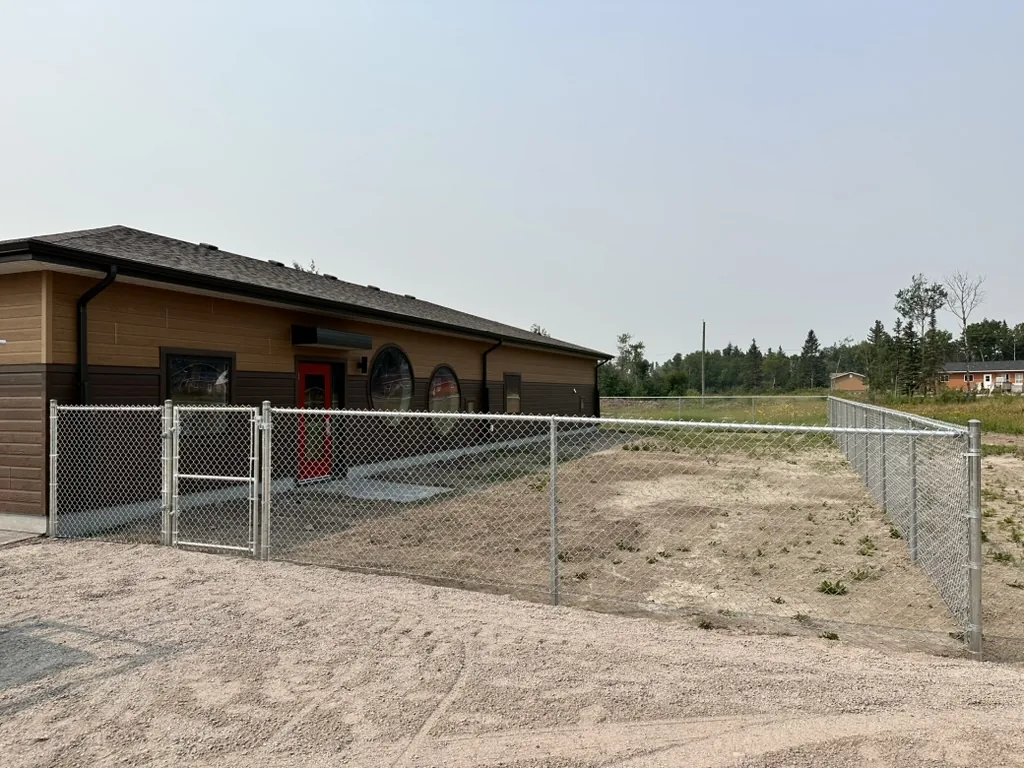
Galvanized
Bright zinc-coated steel. A clean, classic look for commercial and utility sites.
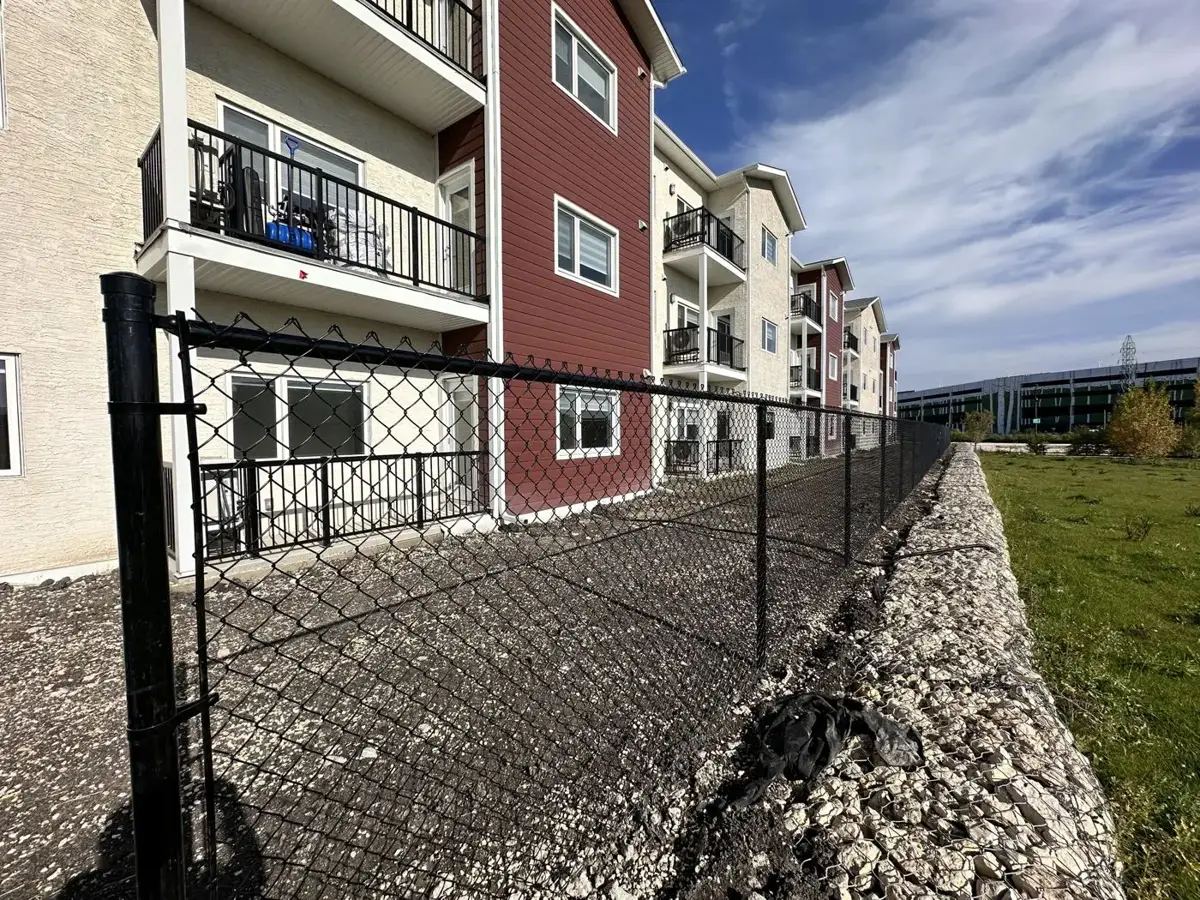
Black
Black-coated fabric, posts and rails. Blends into yards and landscaping.
Height
- Residential
- 3′ · 3½′ · 4′ · 5′ · 6′
- Commercial
- 4′ to 12′
- Specialty
- Taller on request
Material
- 11 gauge
- Residential
- 9 gauge
- Commercial
Residential fences can be upsized to commercial posts, rail and mesh. Lower gauge number = thicker wire.
02 — Inserts
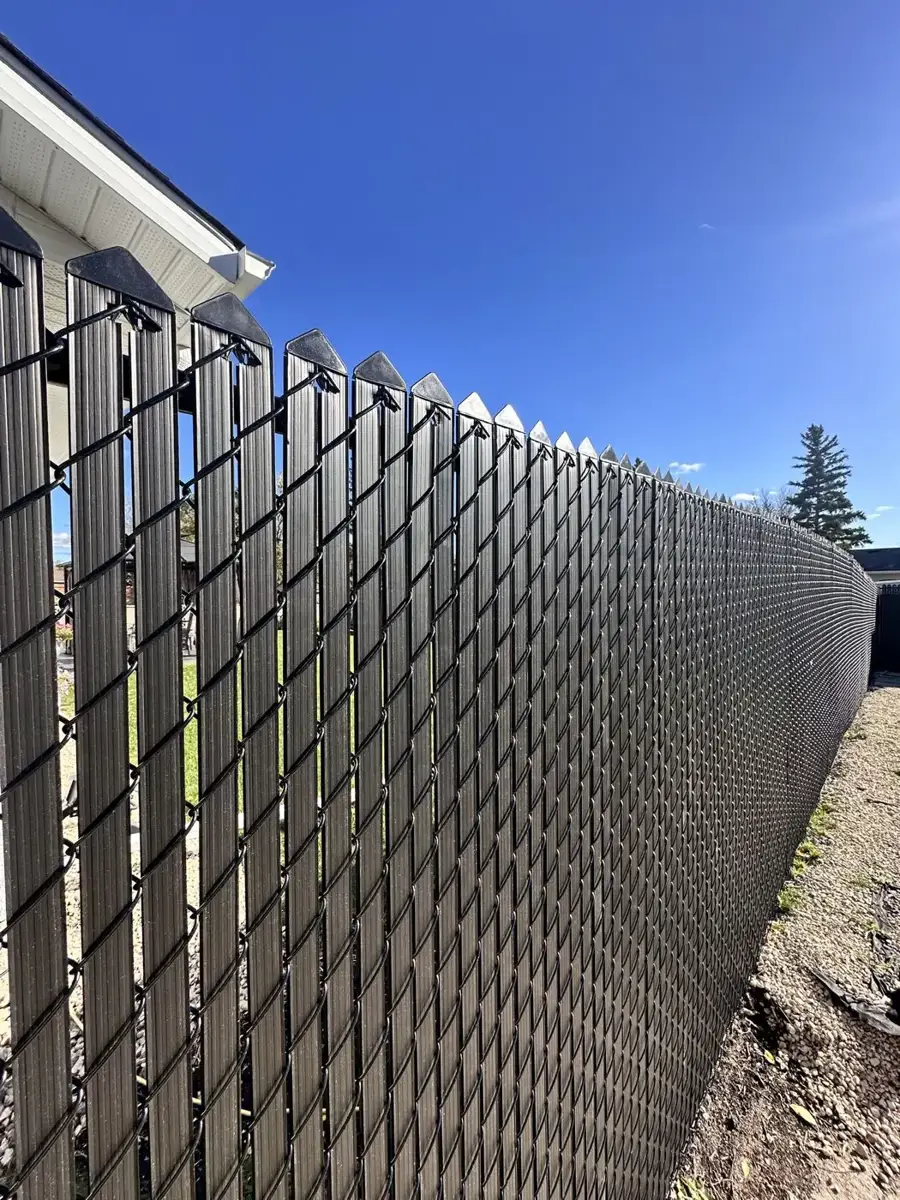
Privacy inserts
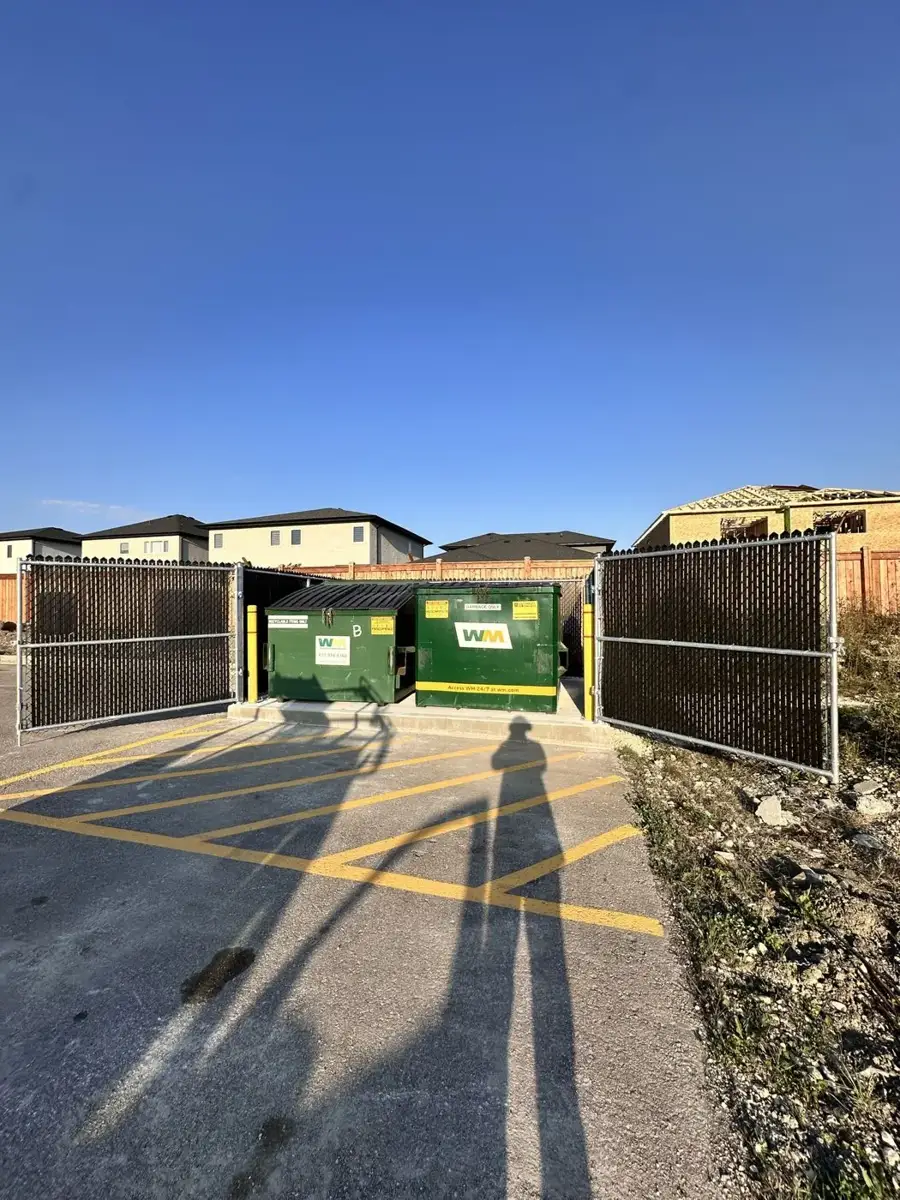
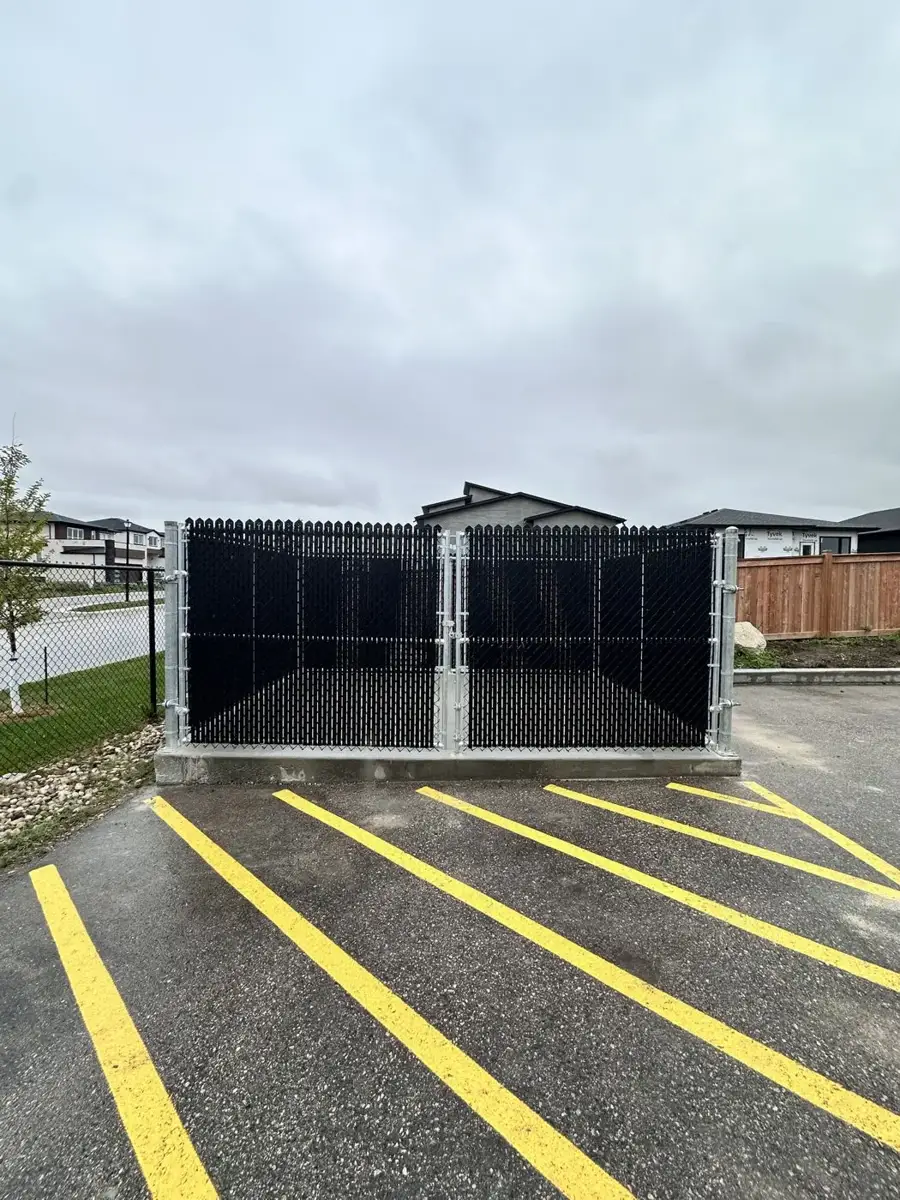
Inserts are slats woven vertically through the fabric. They add privacy, screen bins and equipment, and give chain link a finished look.
Inserts catch wind, so posts go closer together: 6.5′ max spacing instead of 8′.
03 — Gates
Choosing & placing your gate
Rounded frame
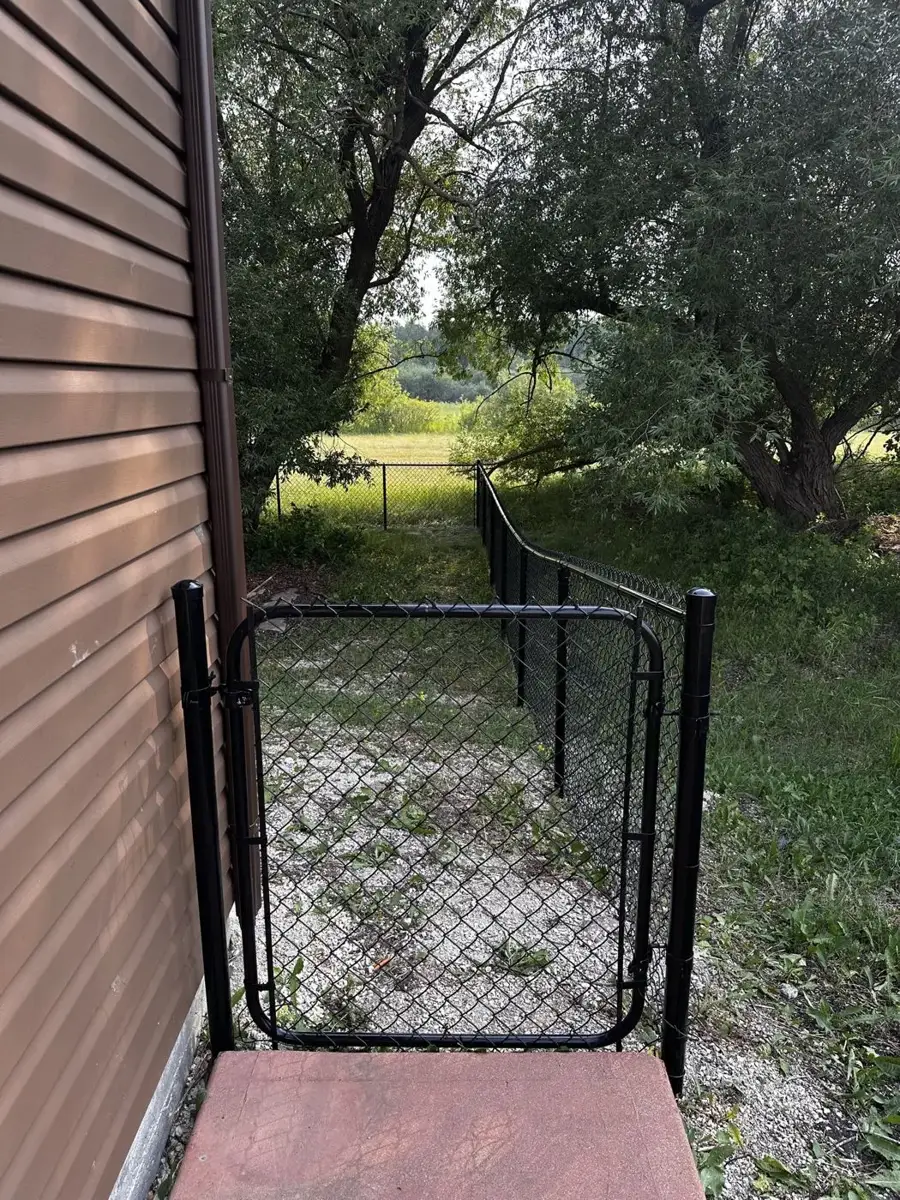
Bent tube with rounded corners. A clean, lightweight walk gate for most yards.
Square welded frame
Welded corners for a stiffer, stronger frame. Built for wide drive gates, heavy use and inserts.
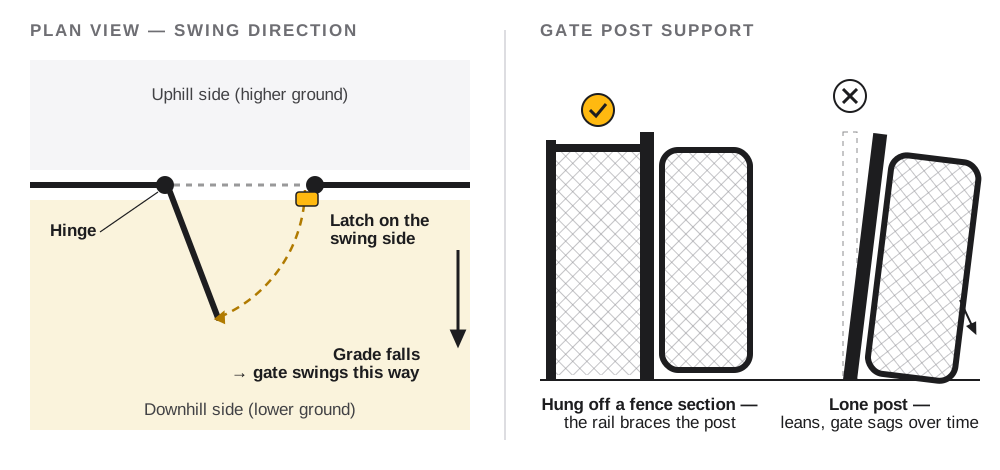
Hang it off a section
We hang gates on a post tied into a fence section. A lone post has nothing bracing it and leans over time.
Swing with the grade
Gates swing toward the lower side so the bottom clears the ground. The latch goes on the same side as the swing.
Gate wheels
Wide and double drive gates can add a wheel on the free end to carry the weight and reduce sag.
04 — Grade & slope
A straight fence on real-world ground
Most yards aren’t level
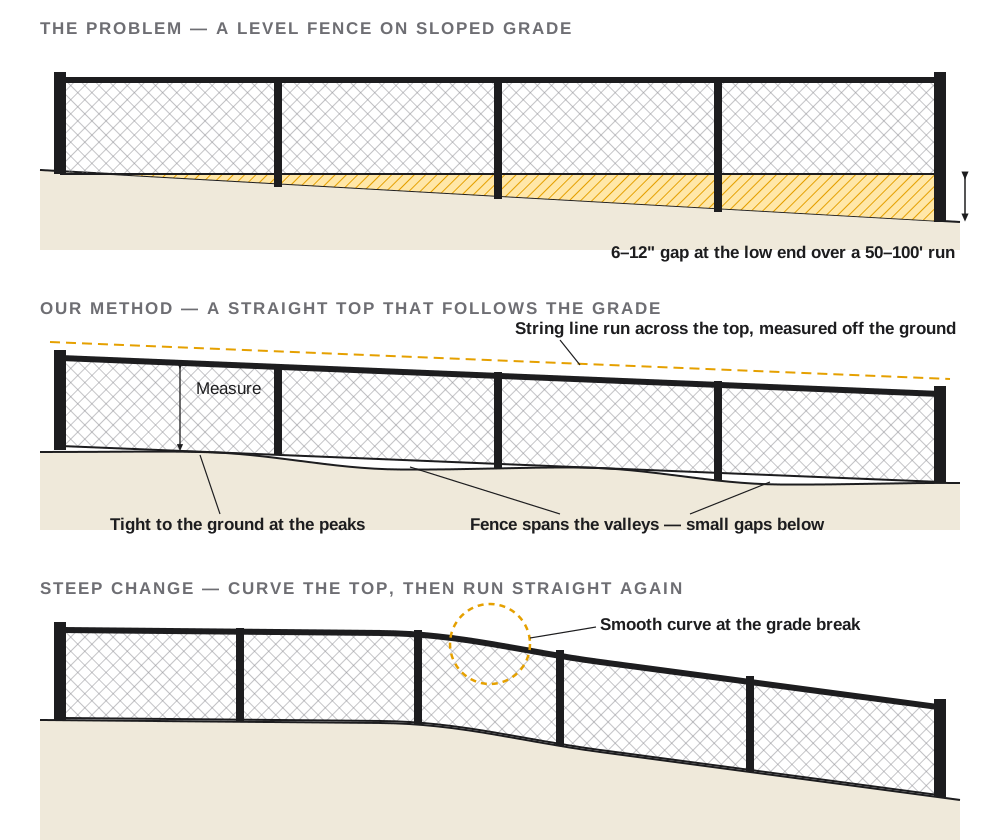
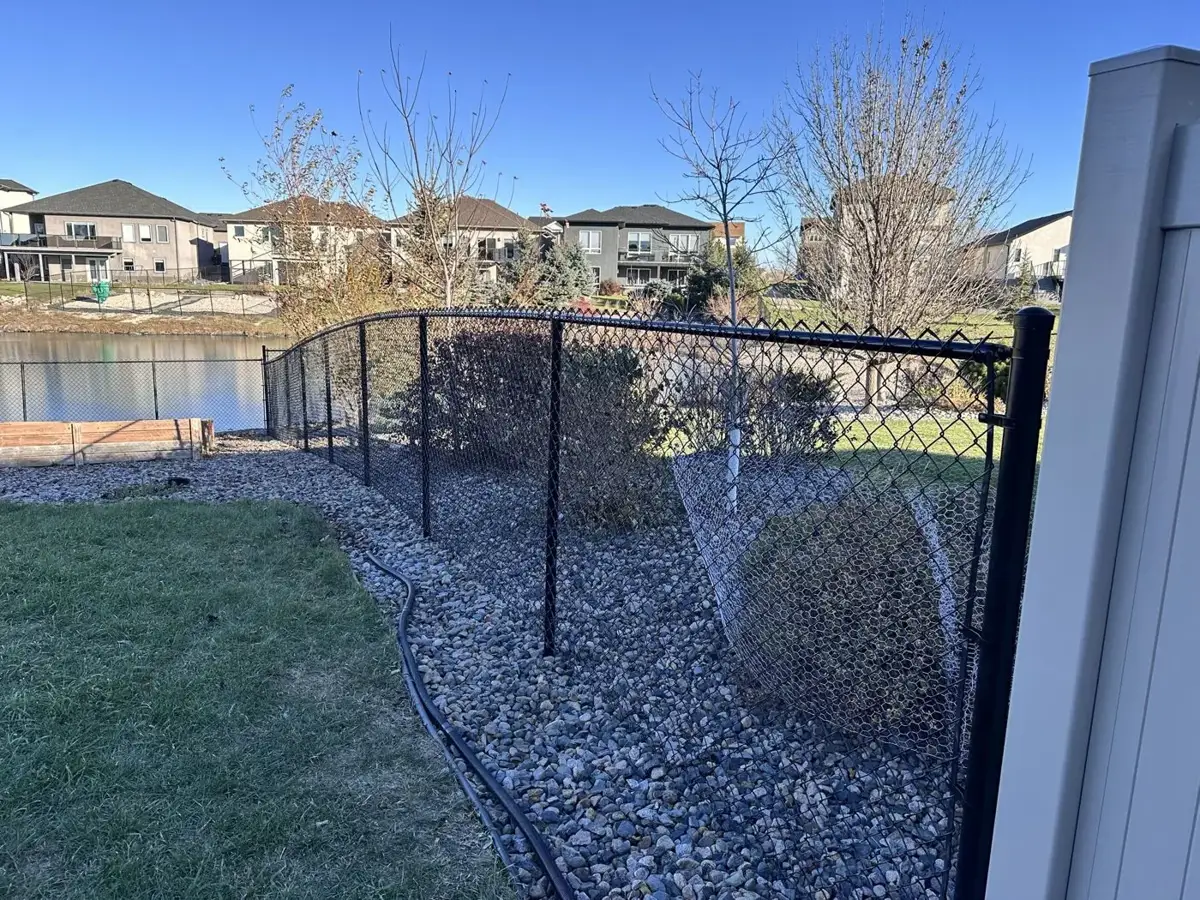
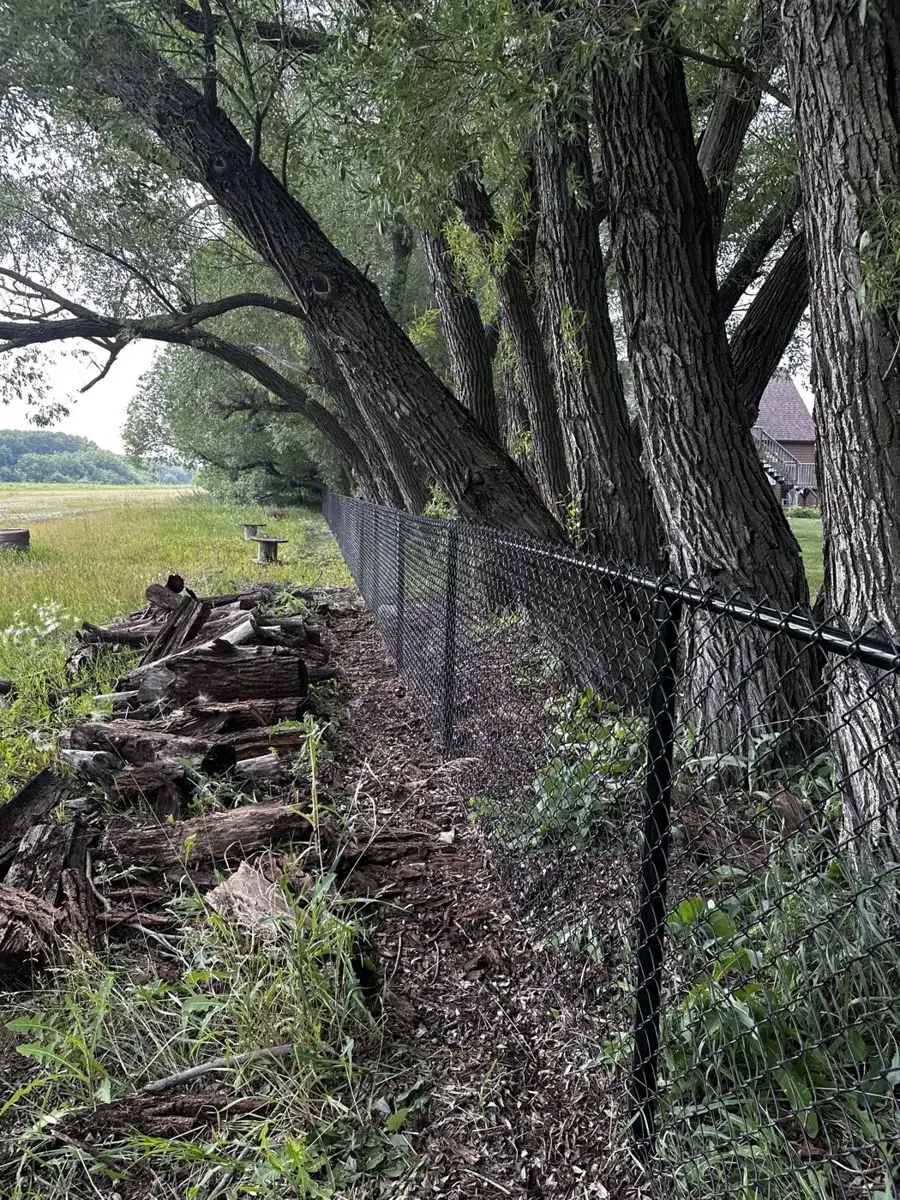
Most yards are graded to slope for drainage; some are close to level. Over a 50–100′ run, that slope would leave a 6–12″ gap under one end of a level fence. Instead, we run the top straight across, following the grade: low to the ground on the peaks and spanning the valleys.
How we set the line
We run a string line across the top and measure off the ground. That shows how the top will look before we finalize the height, and we make minor tweaks to keep it as straight as possible. High spots may get a little digging. Additional bottom wire can be added to close off valley gaps and still maintain a straight line.
Steep slopes
When the slope is too great, we curve the fence to follow it, then return to a straight line past the curve.
Doing it right takes time — and it makes the biggest difference in how your fence looks for its lifetime.
05 — Layout & spacing
Even post spacing, not leftovers
Your layout
Your fence layout is set when we put your quote together. Before install, we may ask for a few details to place it exactly: property pins, gate positions and widths, and any buried lines or sprinklers.
Even spacing
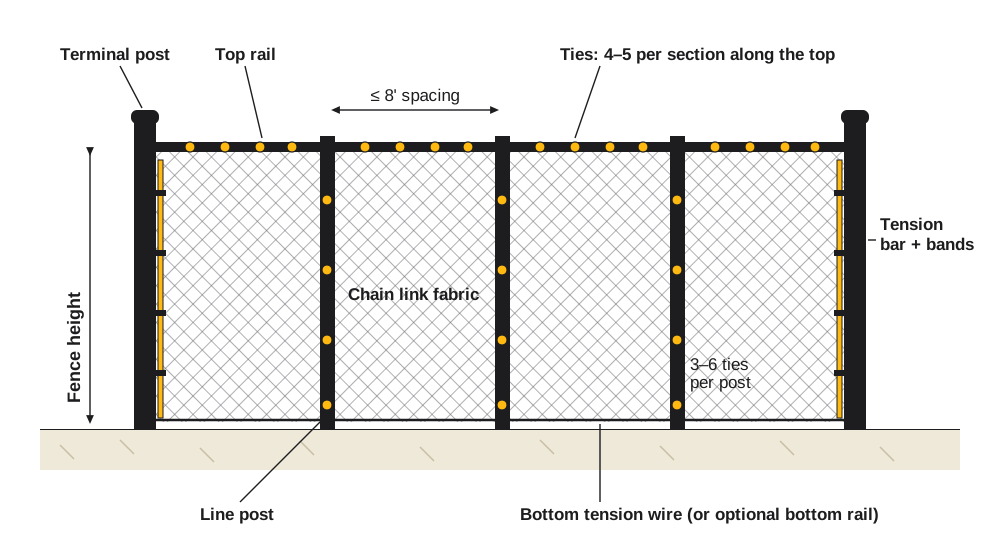
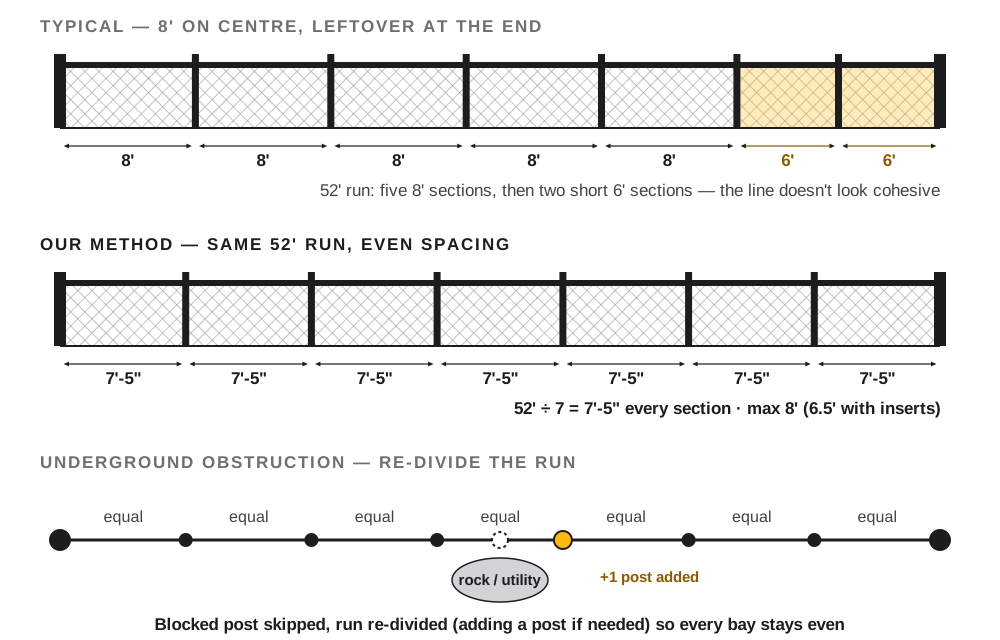
Many installers set posts every 8′ and squeeze the leftover into short sections at the end. We measure each run and divide it evenly: max 8′ apart without inserts, 6.5′ with inserts. If a rock or buried line blocks a post, we re-divide the run, adding a post if needed, so the spacing stays even.
06 — Posts
Direct-driven posts, built for Manitoba
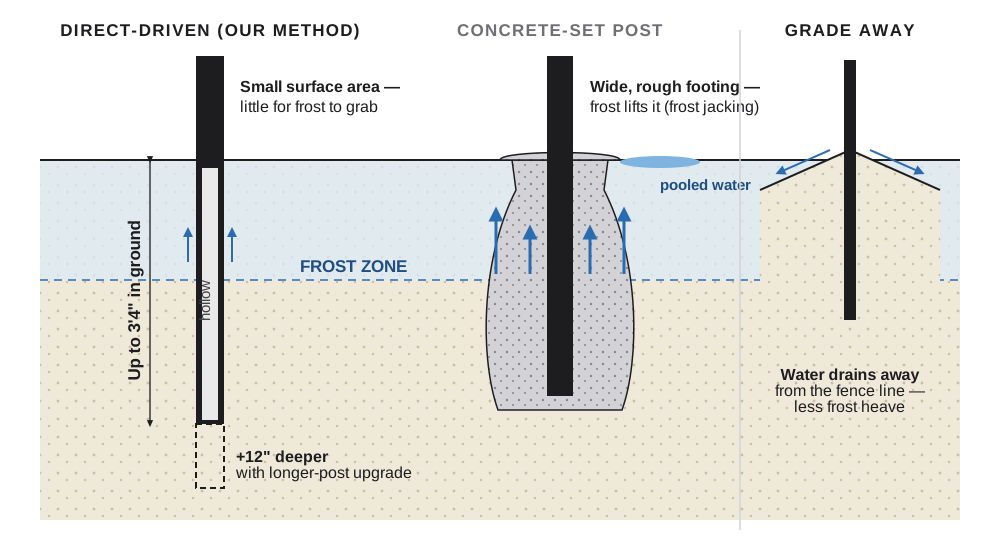
We drive our posts straight into the ground instead of setting them in concrete. A hollow steel post has a small surface area, so frost has very little to grab and push up. That push is called frost jacking, and it’s what lifts and leans fences after a hard winter. Proper grading that keeps water from pooling near the fence helps prevent it too.
The post driver damages the top of the post, so we drive each post to just above fence height and cut it clean. Installed depth is up to 3′4″, and longer posts are an upgrade that adds another 12″ of depth.
07 — Installation
How we install, step by step
Lay out & string line
We mark the line and run a string across the top to preview it, then fine-tune before setting the height.
Drive the posts
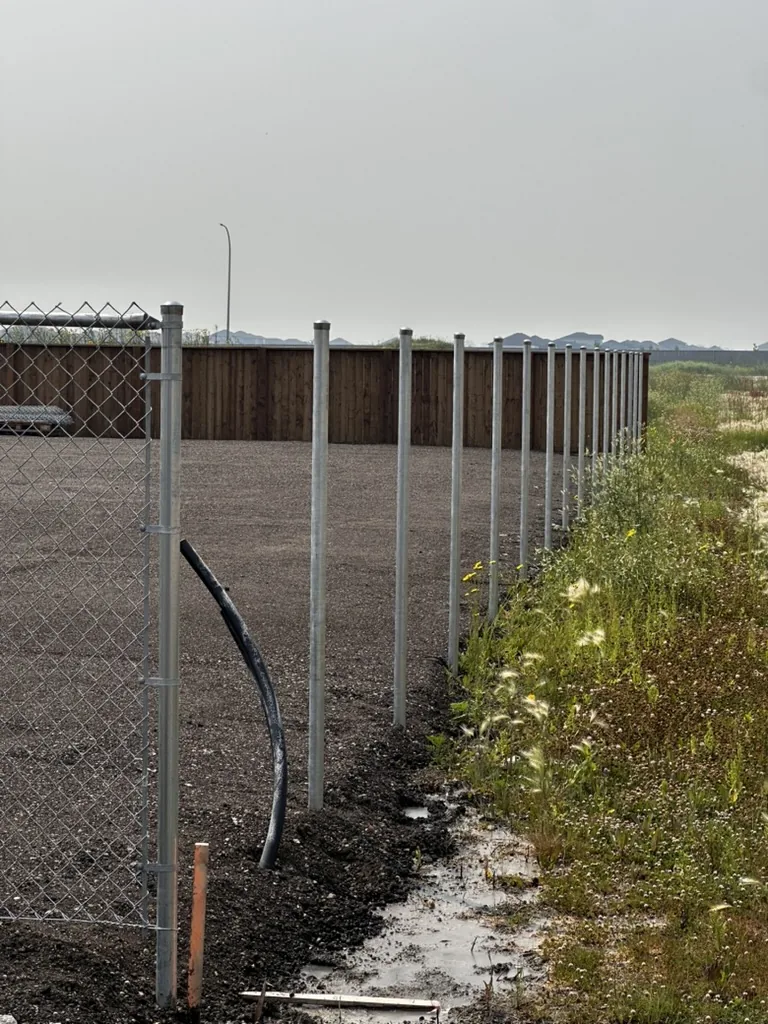
Posts are direct-driven in a straight line, each one placed accurately.
Cut to height
Each post is trimmed clean just above the fence height.
Top rail & bottom
Top rail goes on, plus a bottom tension wire or an optional bottom rail (great for dogs).
Stretch the fabric
Chain link is stretched tight along each fence line and hooked up.
Tie it off
4–5 ties along the top of each section, and 3–6 ties per post depending on height.
Hang the gates
Gates go on last, set to swing with the grade and latched on the swing side.
08 — Extras
Extras worth adding
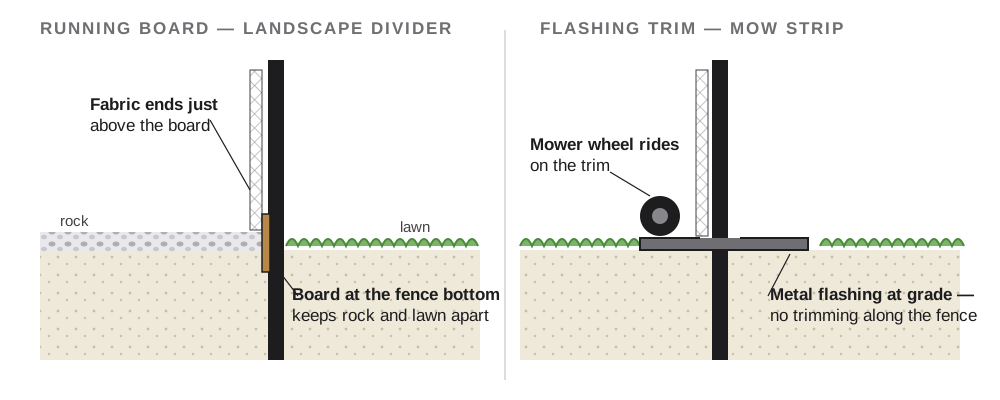
Running board
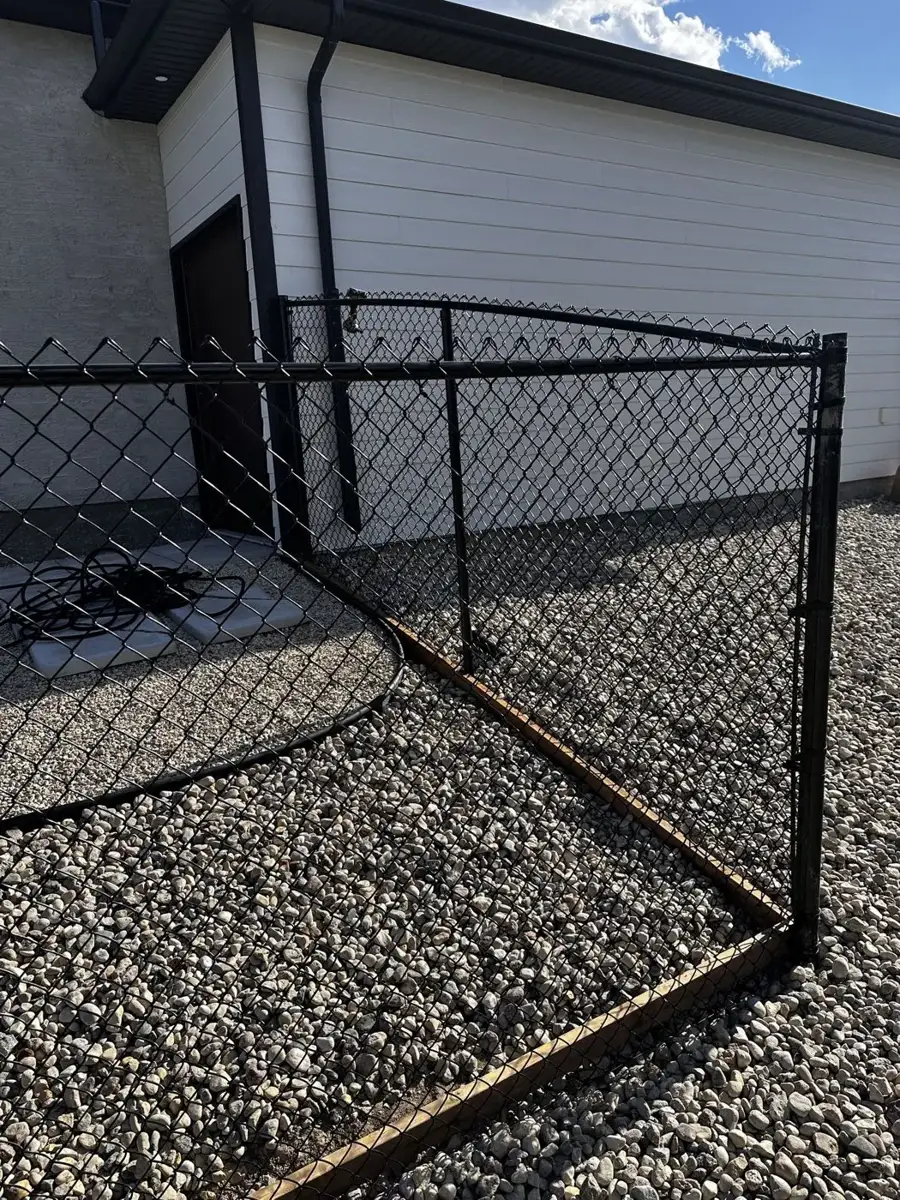
A landscape divider along the bottom of the fence. Keeps rock and lawn apart and gives a clean edge.
Flashing trim
A metal strip at the base of the fence. Your mower rides right along it, so there’s no trimming.