01 — Selection
Height, fabric & finish
Commercial fence is built heavier than residential: thicker fabric, bigger posts, and the option to add rails and barbed wire. We confirm every choice with your quote.
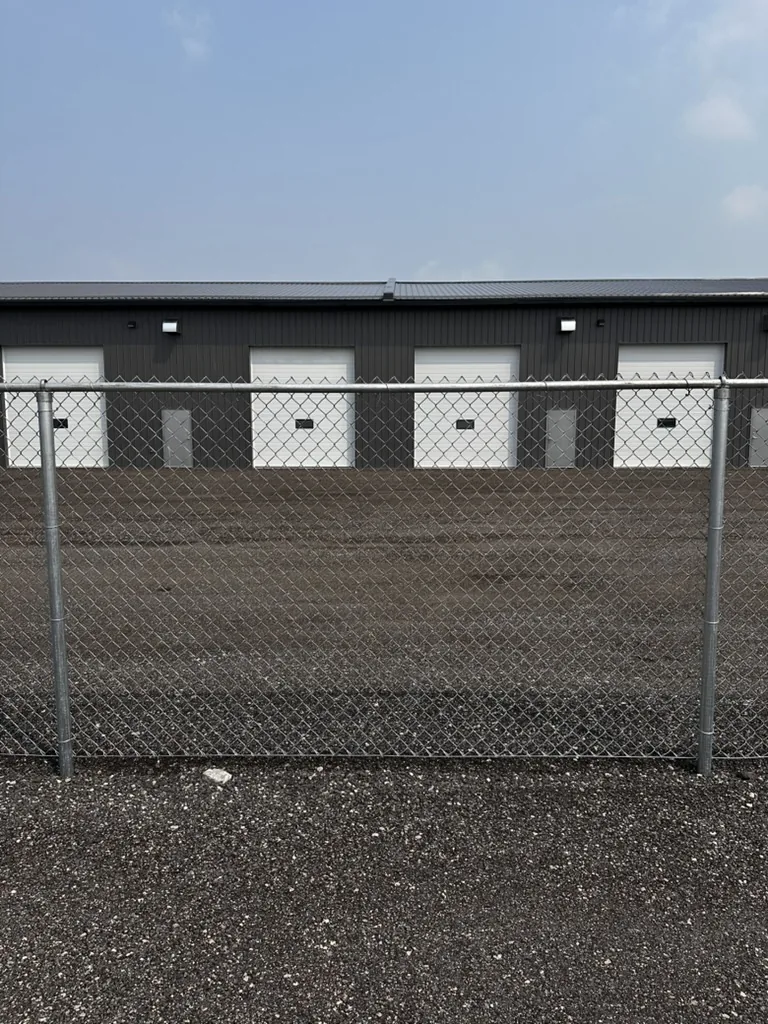
Galvanized
Hot-dip galvanized steel. The standard for industrial yards, utilities and storage sites.
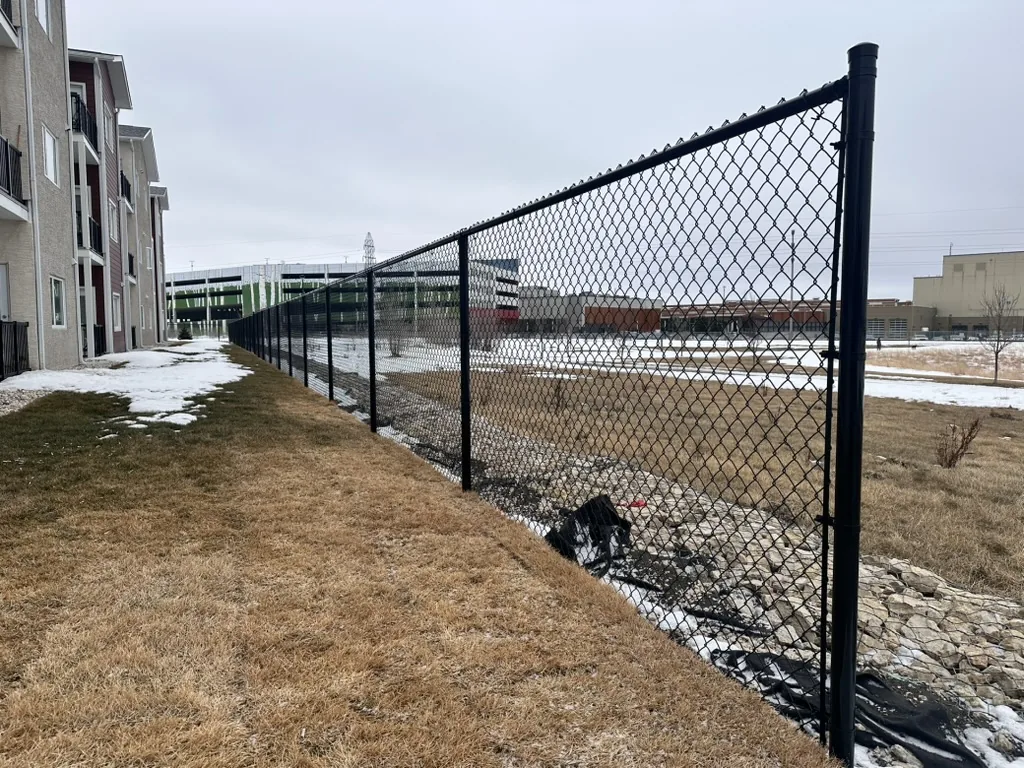
Black
Black-coated fabric, posts and rails. A finished look for multifamily, schools and storefronts.
Height & fabric
- 4′
- 5′
- 6′
- 7′
- 8′
- 9′
- 10′
- 11′
- 12′
Taller specialty fence on request. Barbed wire is an option above 6′.
- 9 gauge fabric
- Commercial standard
Privacy inserts
Slats woven through the fabric screen bins, equipment and yards. They catch wind, so posts go closer: 8′ max instead of 10′.
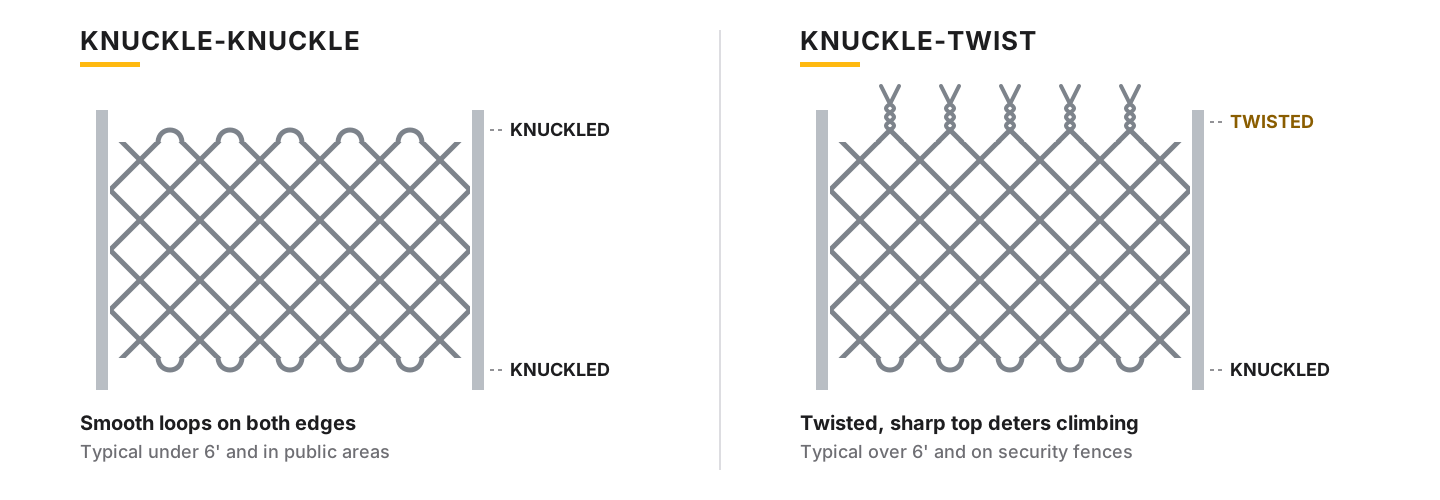
Fabric edges: knuckle-twist vs knuckle-knuckle
02 — Framework
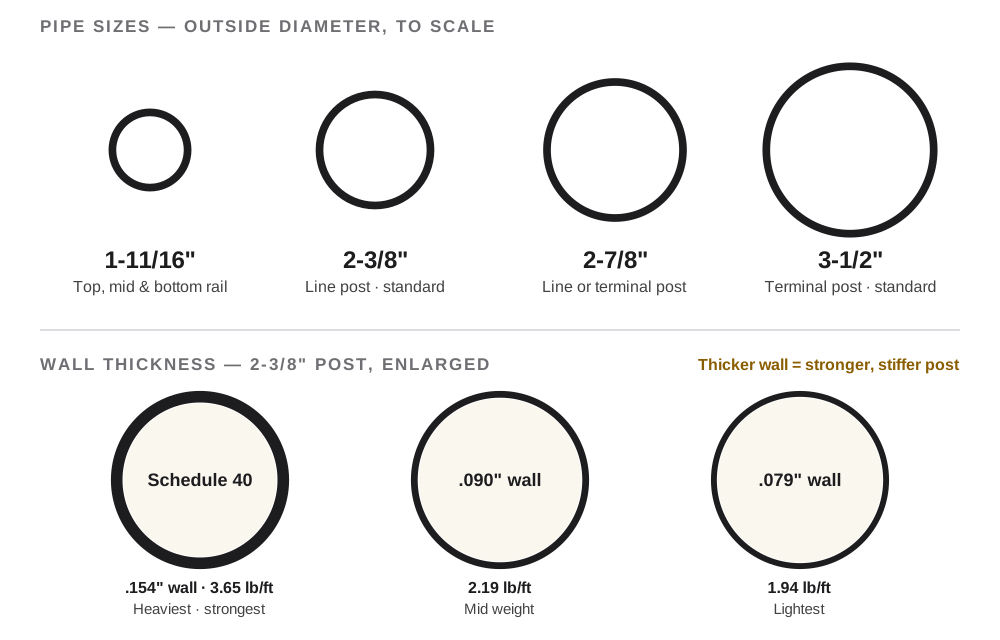
Pipe sizes & wall thickness
Diameter sets the size of each post and rail; wall thickness sets its strength. Thicker walls give stiffer framework for taller fences, barbed wire, privacy inserts and high-traffic sites.
| Pipe (OD) | Used for | Schedule 40 | Mid wall | Light wall |
|---|---|---|---|---|
| 1-11/16″ | Top, mid & bottom rail | .140″ · 2.27 lb/ft | .090″ · 1.51 lb/ft | .079″ · 1.33 lb/ft |
| 2-3/8″ | Line post · standard Terminal option | .154″ · 3.65 lb/ft | .090″ · 2.19 lb/ft | .079″ · 1.94 lb/ft |
| 2-7/8″ | Line or terminal post | .203″ · 5.79 lb/ft | .116″ · 3.45 lb/ft | — |
| 3-1/2″ | Terminal post · standard | .216″ · 7.65 lb/ft | .116″ · 4.20 lb/ft | — |
Terminal posts are ends, corners and gate posts. lb/ft is steel weight per foot.
03 — Rails & security
Rails & barbed wire
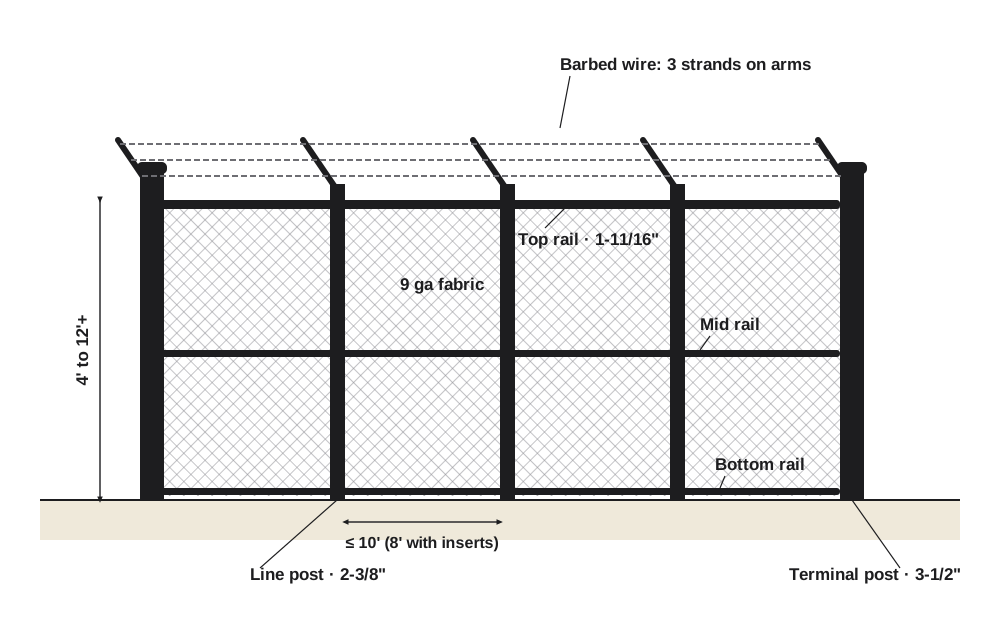
Top rail · standard
Ties the posts together and holds the top of the fabric straight.
Mid rail · option
Adds rigidity to tall fences and makes the fabric harder to push in.
Bottom rail · option
Locks the bottom of the fabric so it can’t be lifted to crawl under. Bottom tension wire is the standard alternative.
Barbed wire
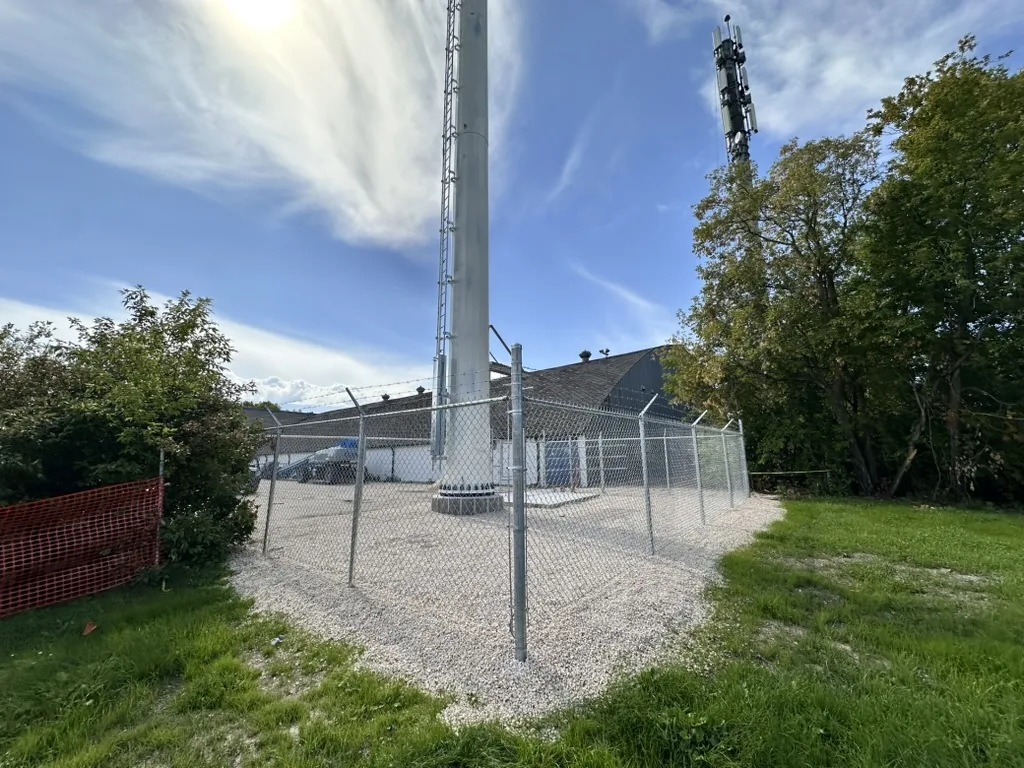
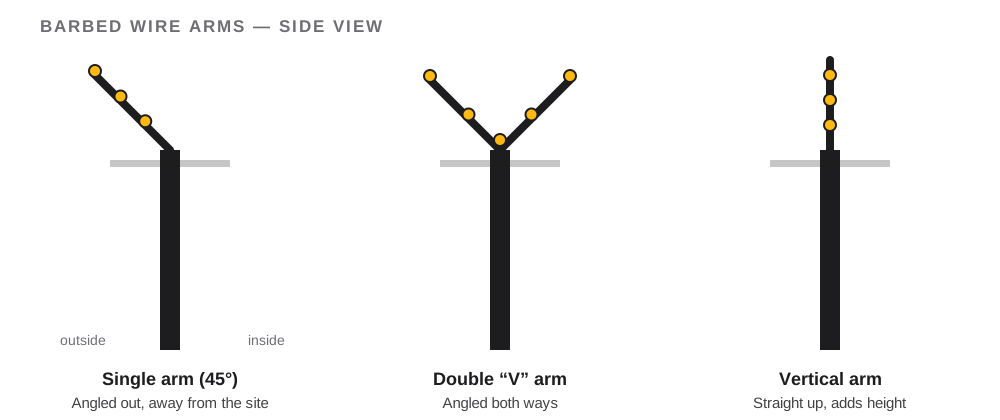
An option on fences above 6′. Three strands of barbed wire on steel arms along the top of the fence. Arms come single (angled out), double “V” or vertical. Barbed wire rules depend on zoning, so we confirm what’s allowed at your site.
04 — Gates
Pedestrian, swing & slide gates
Every gate is built with a square welded industrial frame. Pick the type by who and what goes through it.
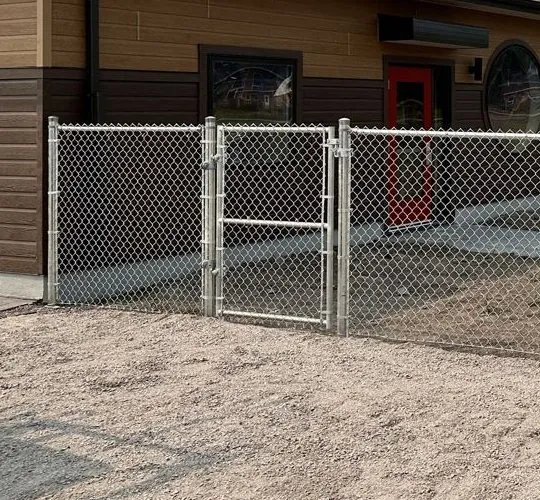
Pedestrian gates
Typically 4′ wide for foot traffic. Self-closing, with panic hardware and access control available.
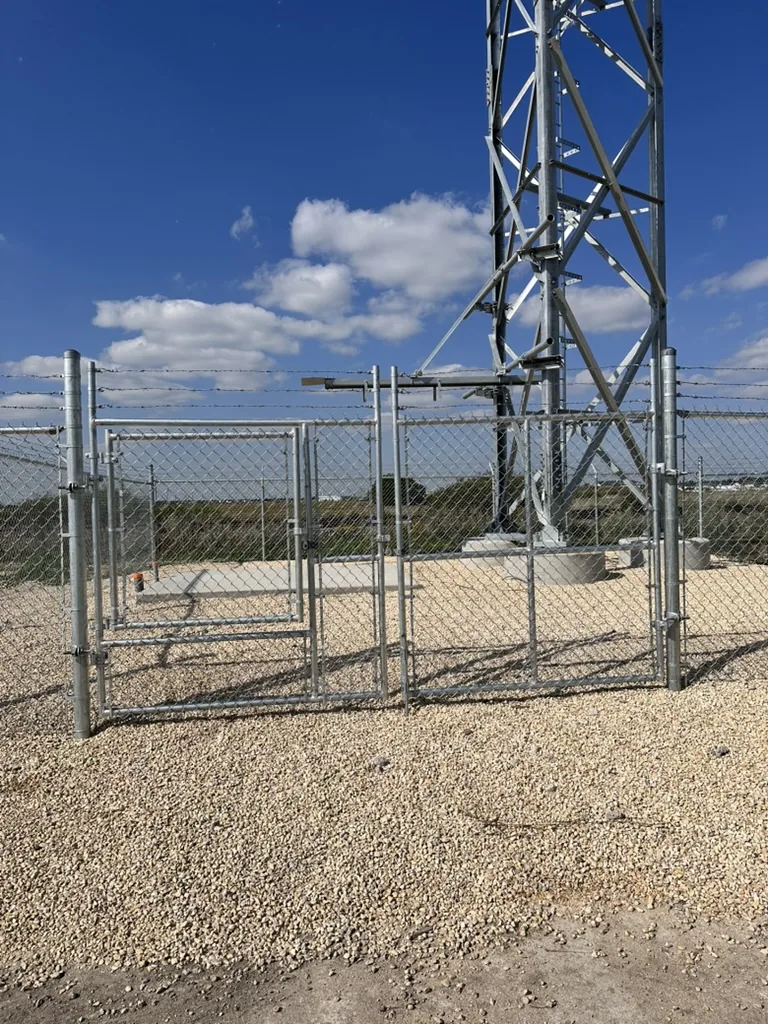
Swing gates
For larger openings. Single or double drive gates swing open for vehicles and equipment.
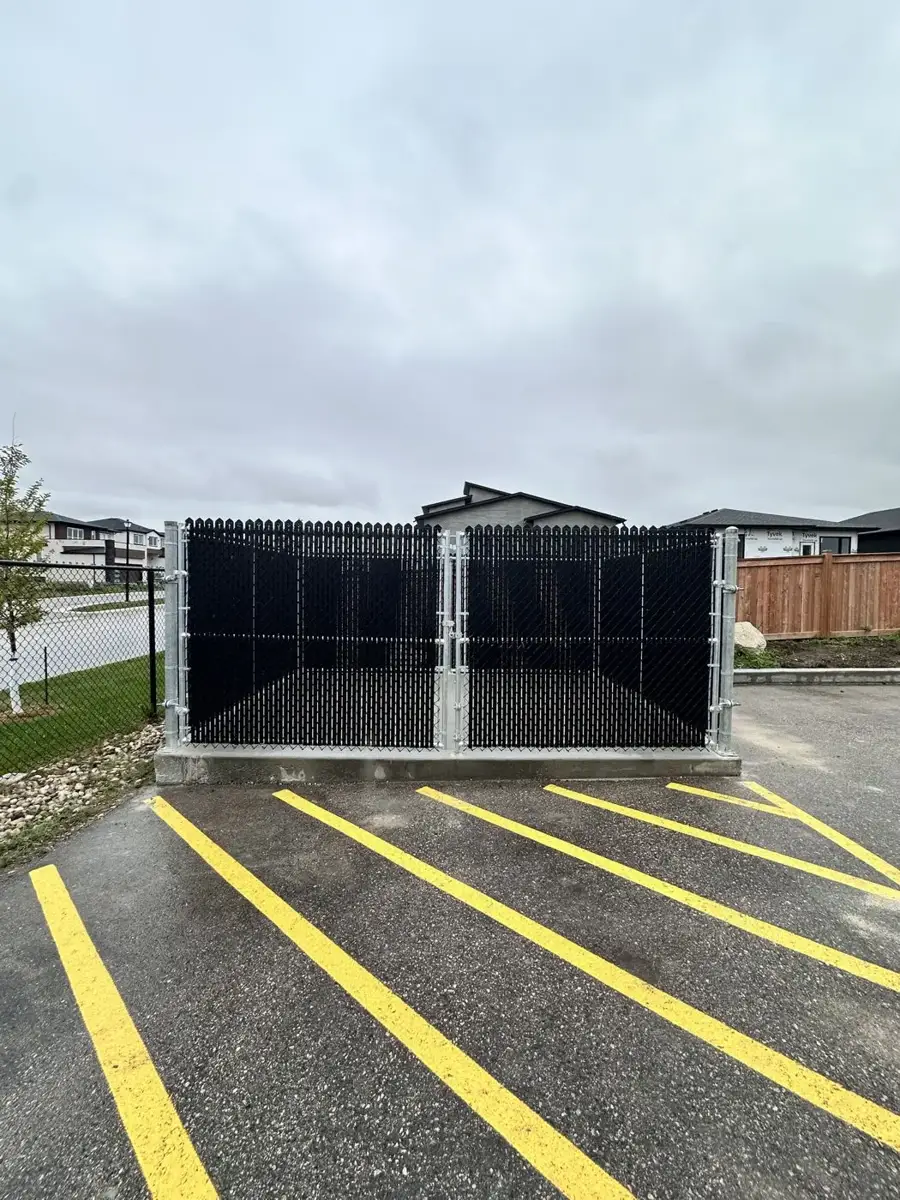
Gates with inserts
Welded frames carry privacy inserts for enclosures that need to stay screened.
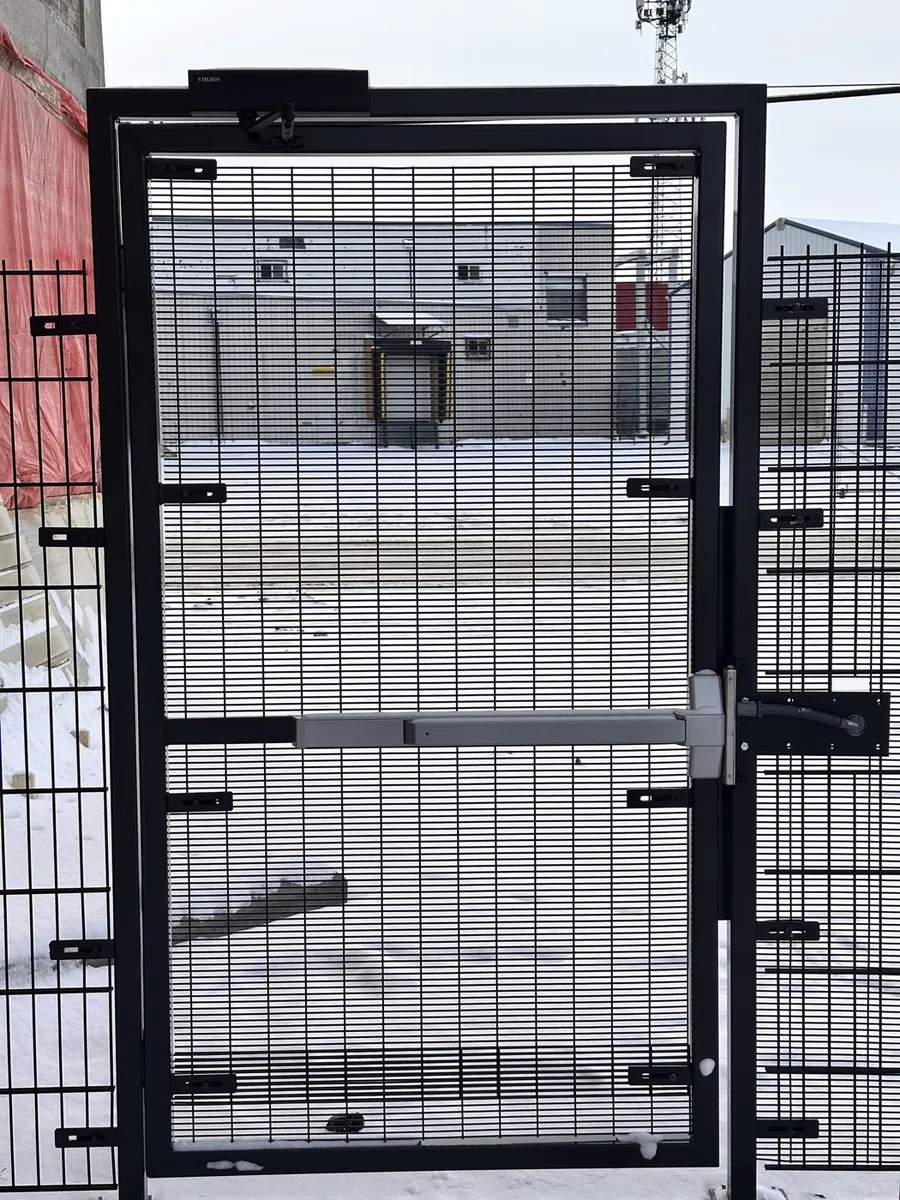
Access-controlled pedestrian gate
- Self-closingA closer pulls the gate shut every time.
- Panic barPush to exit from inside, no key needed.
- Electric strikeReleases the latch when access is granted.
- Keypad entryCode, card or fob access control.
American slide gates
A wheel and fence track system: the gate rolls on wheels and runs along a track on the fence line as it opens.
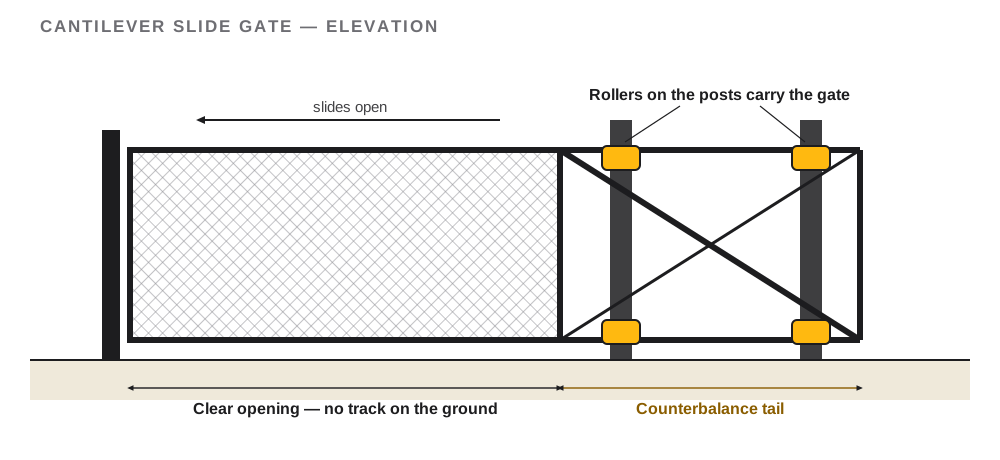
Cantilever slide gates
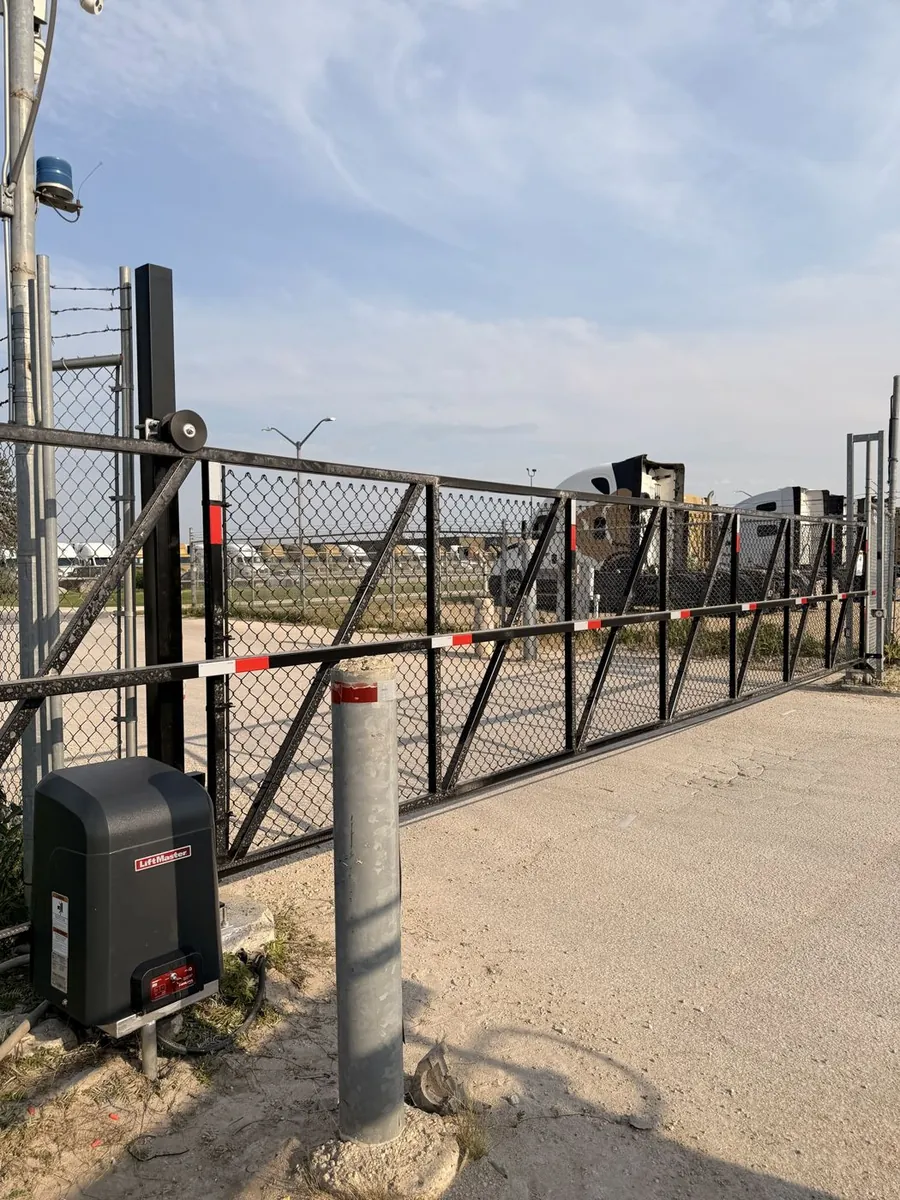
The gate rides on rollers mounted to the posts beside the opening. No track in the ground, nothing to clear of snow or ice. Automation available: add a gate operator with keypads, remotes or access control.
Hang off a section
Gate posts are tied into a fence section. A lone post has nothing bracing it and leans over time.
Swing with the grade
Swing gates open toward the lower side so they clear the ground. The latch goes on the swing side.
Gate wheels
Wide swing gates can add a wheel on the free end to carry the weight and reduce sag.
05 — Layout, spacing & grade
Even spacing on real-world ground
Your layout
The layout is set when we put your quote together. Before install, we may need a few site details to place it exactly: survey pins, gate locations and widths, and any buried utilities.
Even spacing, not leftovers
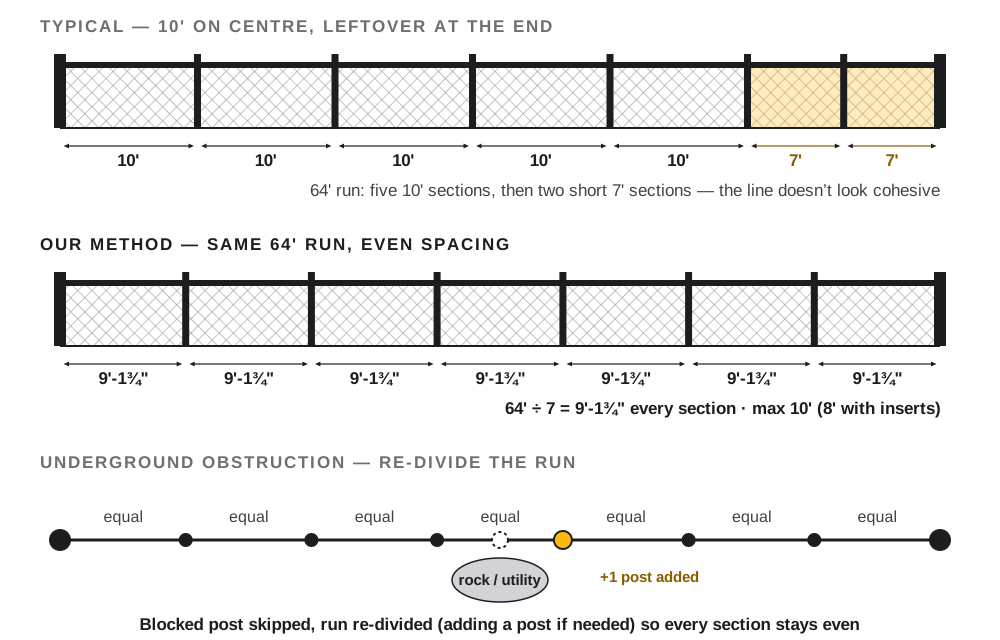
Many installers set posts every 10′ and squeeze the leftover into short sections at the end. We measure each run and divide it evenly: 10′ max, 8′ with inserts. If a rock or buried line blocks a post, we re-divide the run, adding a post if needed.
Most sites aren’t level
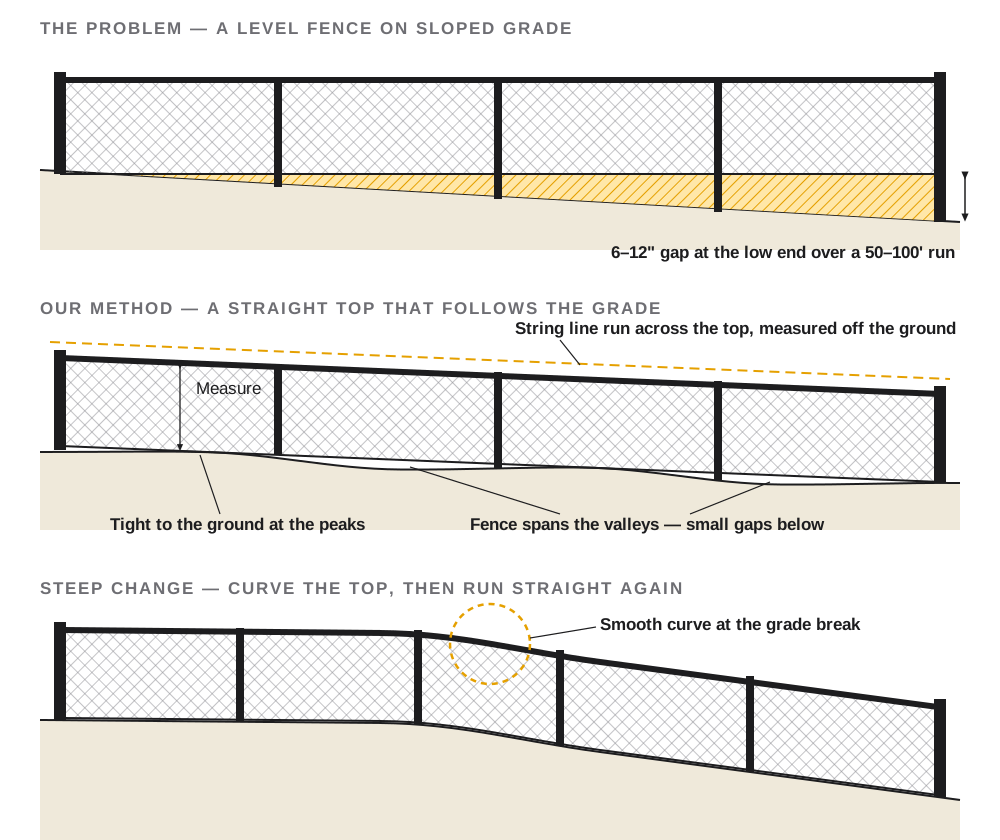
Most sites are graded to slope for drainage; some are close to level. Over a 50–100′ run, a level fence would leave a 6–12″ gap under one end. Instead, we run the top straight and follow the grade.
How we set the line
A string line across the top, measured off the ground, shows the top before we set the height. High spots get a little digging. A bottom rail or additional bottom wire can close valley gaps and keep a straight line. Steep slopes get a smooth curve, then run straight again.
Doing it right takes time — and it makes the biggest difference in how your fence looks for its lifetime.
06 — Posts & installation
Every post direct-driven
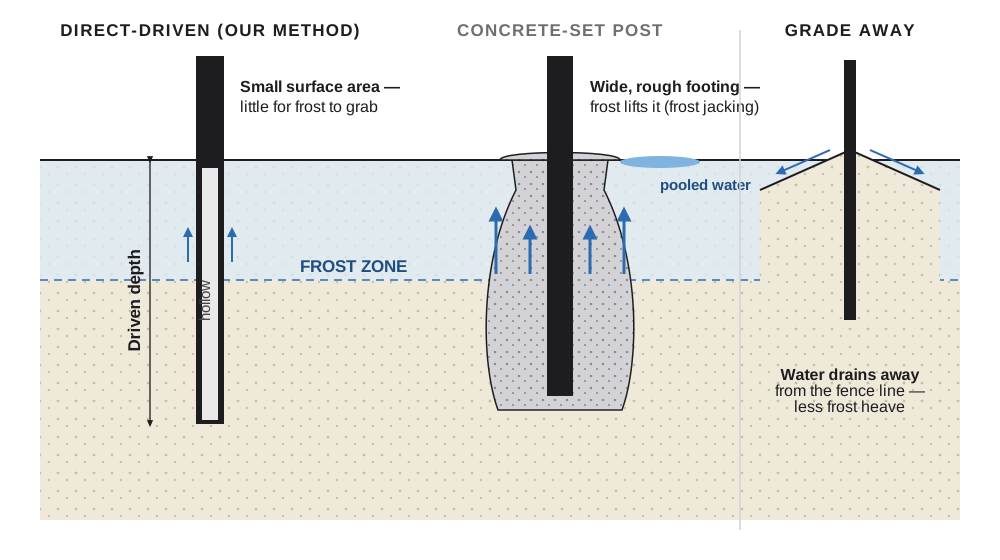
Line, terminal and gate posts are all driven straight into the ground, no concrete. A hollow steel post has a small surface area, so frost has very little to grab and push up. That push is called frost jacking, and it’s what lifts and leans fences after a Manitoba winter.
The driver damages the post top, so we drive each post just above fence height and cut it clean. Bigger diameters and thicker walls are available where the site needs more strength.
Lay out & string line
Mark the line and preview the top before setting the height.
Drive the posts
Every post driven in a straight line, spaced evenly.
Cut to height
Each post trimmed clean above fence height.
Rails
Top rail, plus mid and bottom rail or bottom wire as specified.
Stretch the fabric
9 gauge fabric stretched tight and hooked up.
Tie it off
Fabric tied to every rail and post.
Barbed wire
Arms and three strands where specified.
Hang the gates
Swing or cantilever slide gates set and latched last.